PHOTOGRAPHING THE MAY 15, 2022 LUNAR ECLIPSE
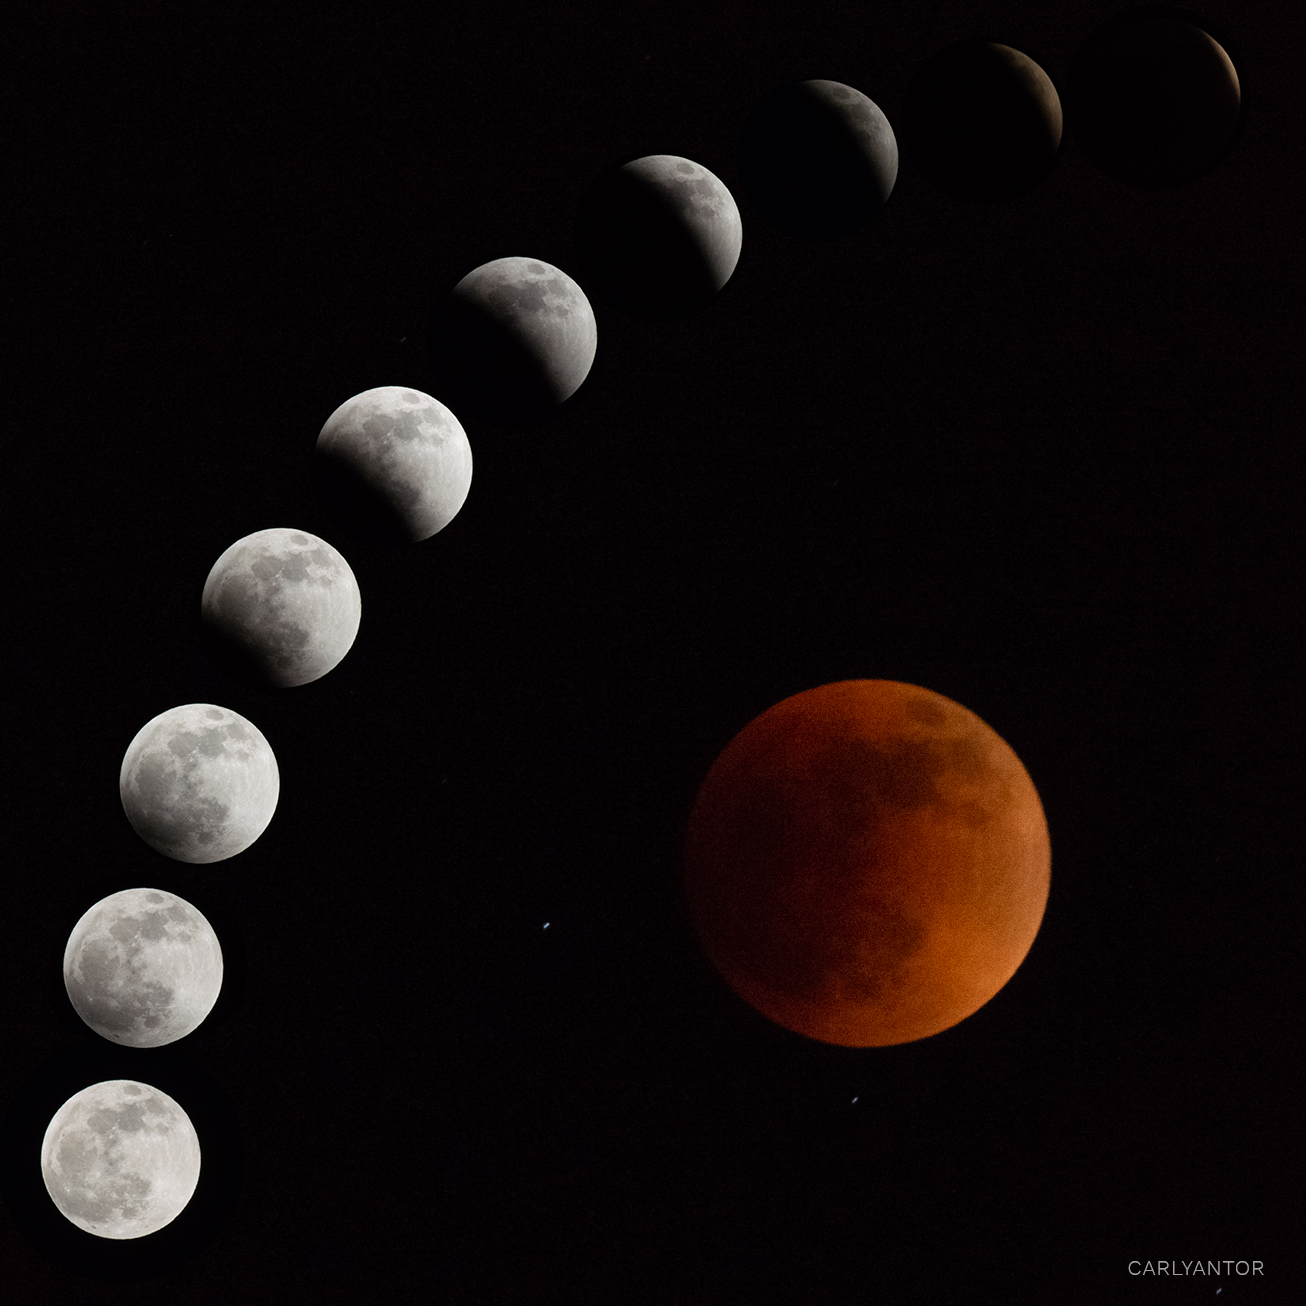
I took these lunar eclipse photos on May 15, 2022 from my backyard in Lakeland, Florida.

I consider myself just a hobby photographer, so this post is just for fun! I couldn’t resist photographing the May 15 lunar eclipse last night. I always love experiencing an eclipse & taking the time to sit outside and take it in.
This eclipse fell on my birthday (so this one was extra special to observe!) and I had a clear view from my backyard in Lakeland, Florida 🌙 I’ve got a ways to go with perfecting my sky photography process, but each time I do this I learn a little bit more. I am always happy to share my process about night sky photography and have learned a lot from others’ blogs on some tips and tricks.
Photographing a lunar eclipse can be a little difficult to figure out for the first time, so I wanted to write about my process to help other people be able to take great photos. The next lunar eclipse visible in North America is November 7, 2022, and I’m marking my calendar!
Equipment:
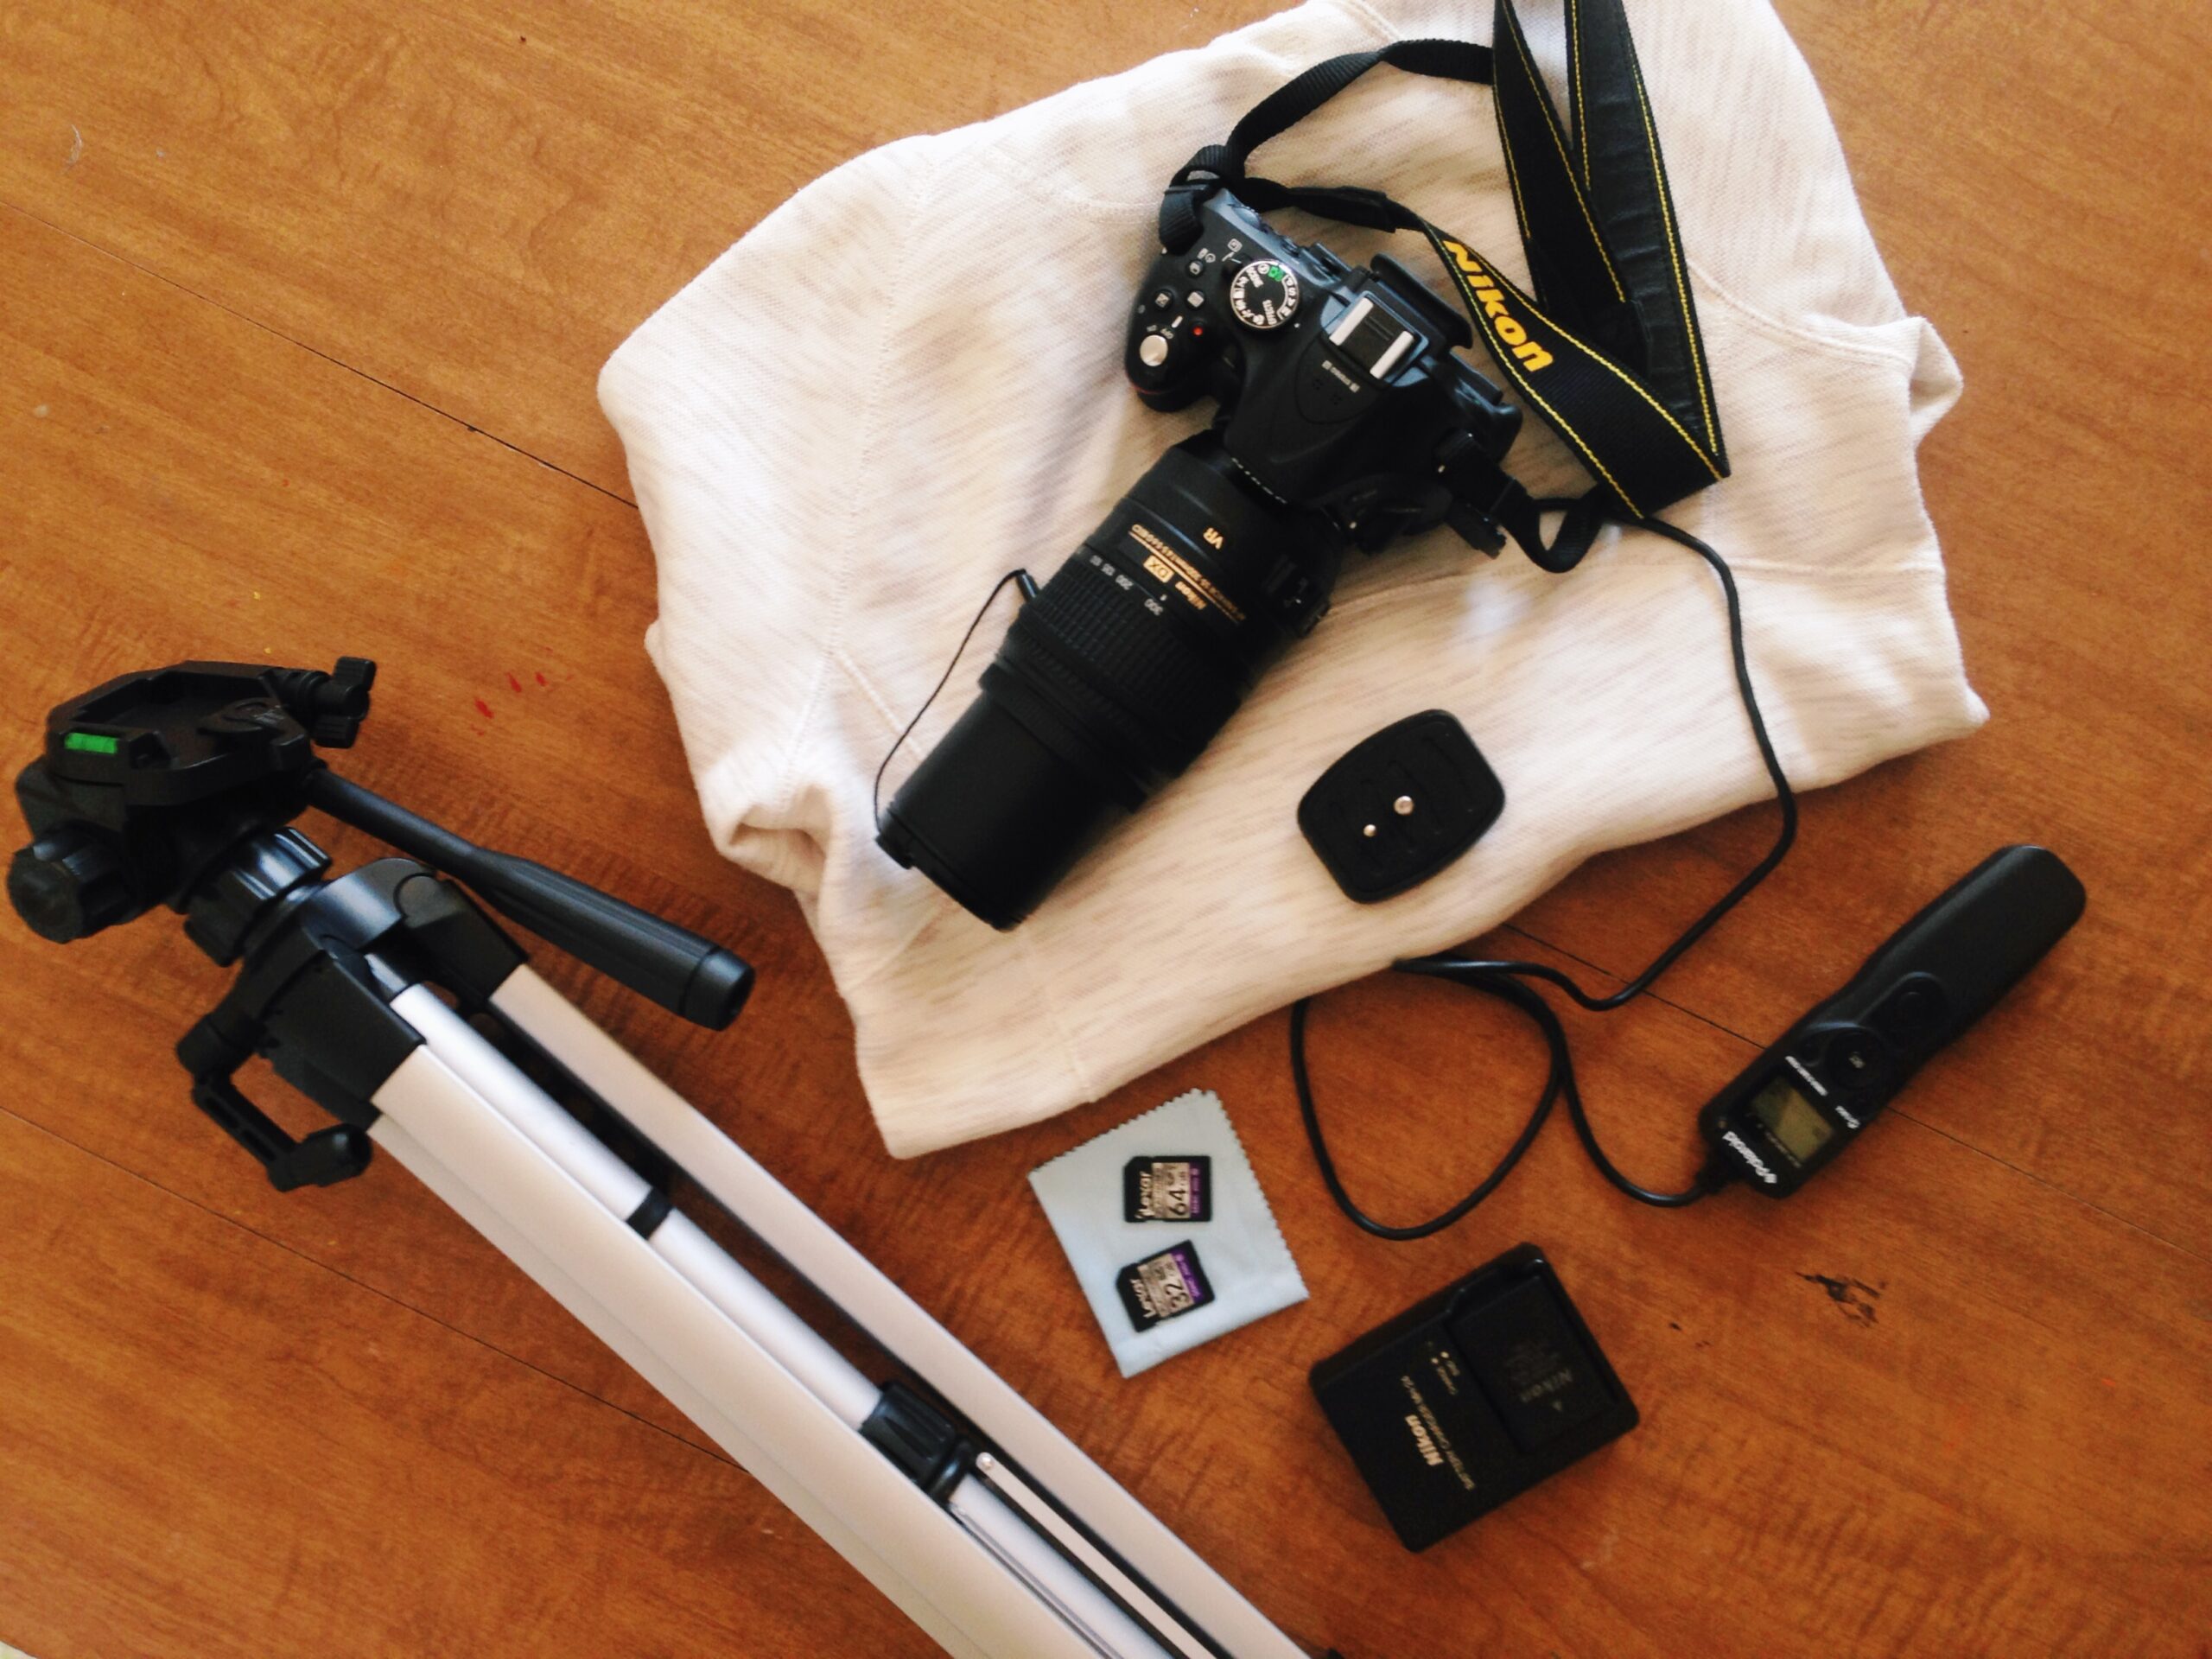
- Camera: Nikon D5200 Digital SLR camera
- Lens: Nikon AF-S NIKKOR 55-300mm f/4.5-5.6G
- Polaroid Shutter Release Timer Remote Control For Nikon — helpful to prevent camera shake blurriness
- Tripod
- 2 memory cards (I only needed one, but just in case I like to have plenty of available storage space)
- Extra camera batteries (If you are in a colder climate, you may need more than one battery)
Setup and Process:
A tripod is absolutely essential for taking photos of the lunar eclipse. When I am zoomed in to 300mm and using a longer exposure time any shake will make the photo blurry. That being said the use of a shutter release is also needed because even pressing the shutter button on the camera will cause shake. Another option besides using a shutter release is to use a 2 second self timer built into the camera. I prefer the shutter release because I find it easier than the camera timer option. This allows me to have crisp focused photos.
I prefer shooting in manual mode almost always, because it gives me exact control over the photo. I was using my Nikon D5200 and my 55-300mm lens.
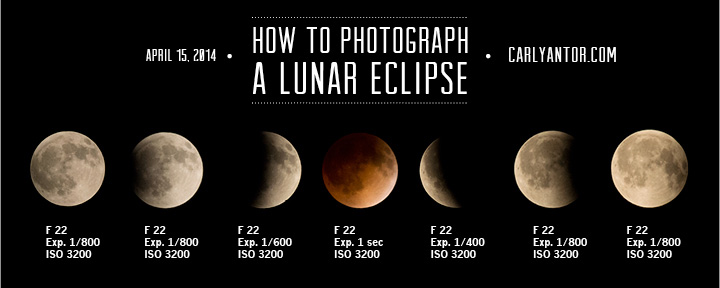
I kept my focal length at 300mm the entire night so that I could get as many details of the moon’s surface as possible. Of course, every camera and lens is different, but the settings that worked well for me were keeping my ISO at 3200, aperture at F22, and adjusting my shutter speed according to how much light the moon was putting off. I started with 1/800 when the moon was full at the start of the eclipse. Then I slowly lengthened my shutter speed as the eclipse happened. I was dropping my shutter speed down to 1 second exposure when there was little remaining light on the moon. For the blood red moon during the eclipse totality, I was testing between 1-3.5 second exposures of the moon. I have room for improvement around the totality phase, because I was struggling to get a clear manual focus on the moon during that phase. At the bottom of this post, I have an infographic that I made when I photographed the lunar eclipse in April 2014 (so long ago!) that shows my camera settings at each stage. I found this extremely helpful as a reference to look back on for myself, so maybe it will help you as well.
Timing:
For the penumbral phase from 10:15 pm Eastern Time to around 11:30 pm, I took a photo every 5 minutes. But during my editing process for this I only ended up using photos from 10-15 minute intervals to show the progression of the penumbral phase in about 10 photos. During the eclipse totality (the red moon) I took many photos but did not get a good progression of the red shadow changing because I was struggling to get the moon in focus. I did get a few decent shots of the red moon though, and I used one as the large red moon photo in the composite. Definitely something I can work towards for next time!
Creating the Composite Photo:
I always suggest shooting in RAW files if the option is available. I like to be able to open my RAW files in the Photoshop RAW editor and have the option of adjusting exposure or any other setting I may have messed up. Fortunately for these moon photos, my settings were set just about right so there was very minimal editing, if any, to these photos. Mainly in the raw editor I cropped the photos down, picked which ones I wanted to use, and saved them out into the same format in a file where they were all numbered nicely for me. Then I started my composite in Photoshop of all the images I wanted to use to show the stages. I wanted the viewer to be able to clearly see the penumbral phase of the eclipse so I made those stages arc around the larger “red moon at totality” image.
This photo shows the equipment I use for night sky photography.
I also photographed the full lunar eclipse in 2014 (so long ago!) and loved it, and made an infographic to show my camera settings. Those were really helpful reminders for me years later, today in 2022 so I thought I would share it for you to use as well.


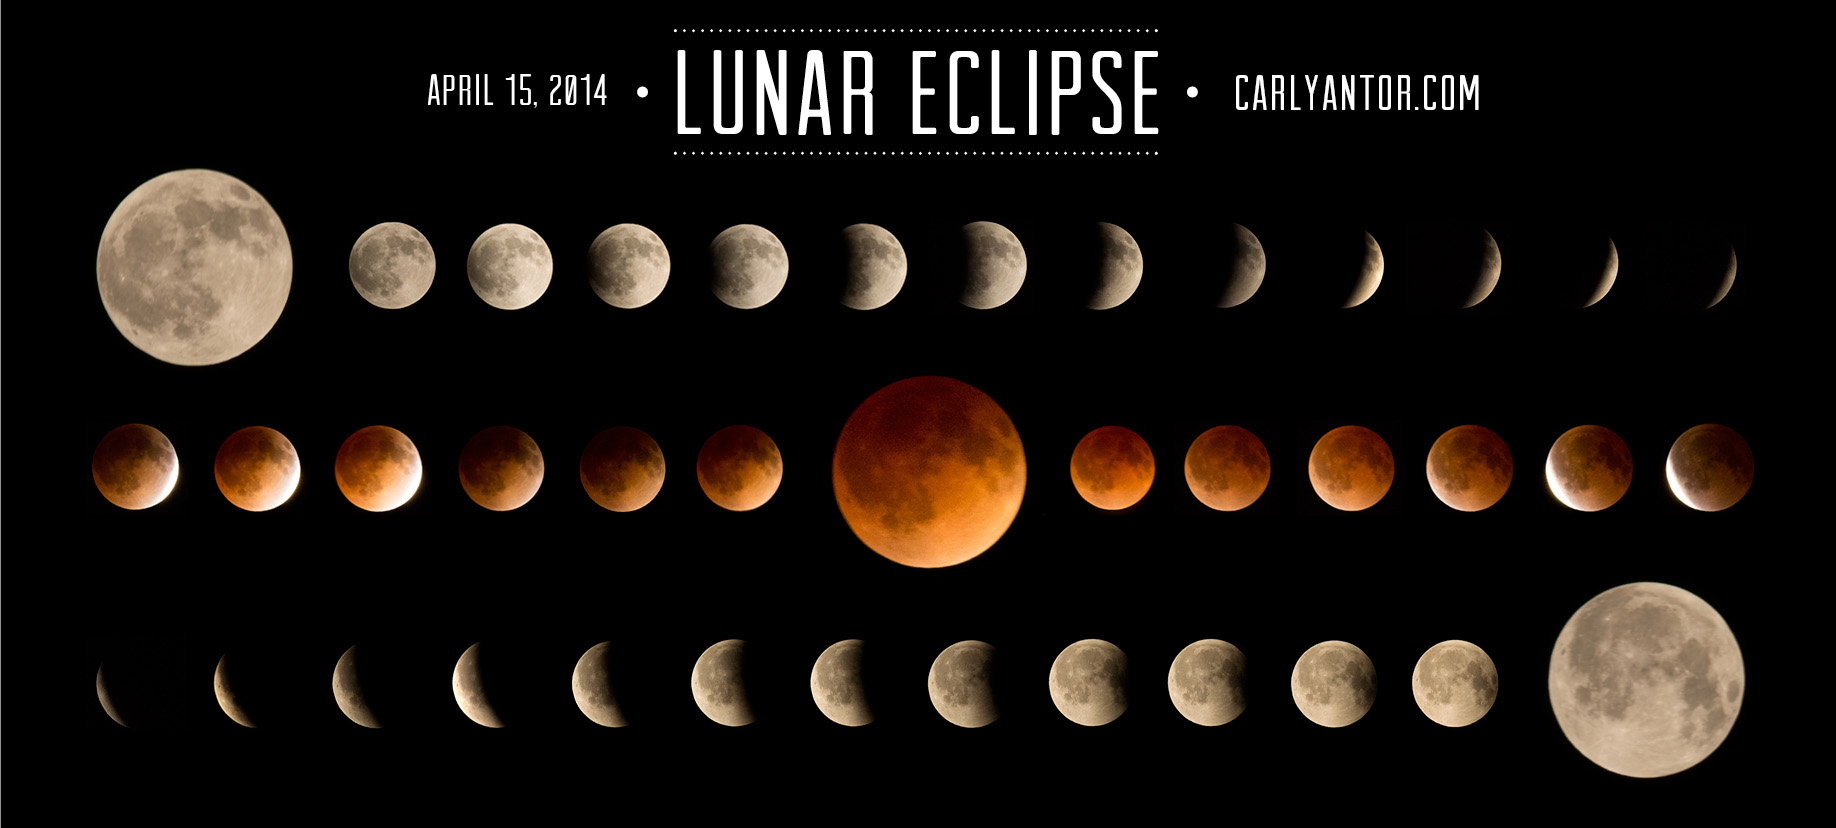
MY PHOTOS FROM THE APRIL 2014 LUNAR ECLIPSE
Below, just for fun – I’m also sharing my most successful lunar eclipse photo set to date, which was in April 2014, where I was able to capture the entire eclipse in each stage and created this composite photo. I had great success from my location in Kirksville, Missouri with limited light pollution in getting the red blood moon in focus. I found that a lot more difficult this time around in 2022. But, I know it’s possible since I’ve done it before so I’ll be excited for the next eclipse to try again!


